My time
The My Time menu of the Time Off application houses all the various time off information for the signed-in user.
This includes the main Time Off dashboard, which displays an overview of the various time off balances, as well as time-off requests and allocations.
Dashboard
All users have access to the Time Off Dashboard, which is the first page that appears when the Time Off application is opened. The Dashboard can also be accessed at any point in the application, by navigating to .
The current year is displayed, and the current day is highlighted in a red circle.
To change the view, click on the Year button to reveal a drop-down menu. Then, select either Day, Week, or Month to present the calendar in that corresponding view.
Note
To change the displayed dates, click the (left arrow) or (right arrow) icons to the left of the Year button. The calendar view adjusts in increments of the selected view.
For example, if Year is selected, the arrows adjust the view by one year.
To reset the view, so it includes the current date, click the Today button.
Above the calendar view is a summary of the user’s time off balances. Every time off type that has been allocated appears in its own summary box. Each summary lists the type of time off, the corresponding icon, the current available balance (in hours or days), and an expiration date (if applicable).
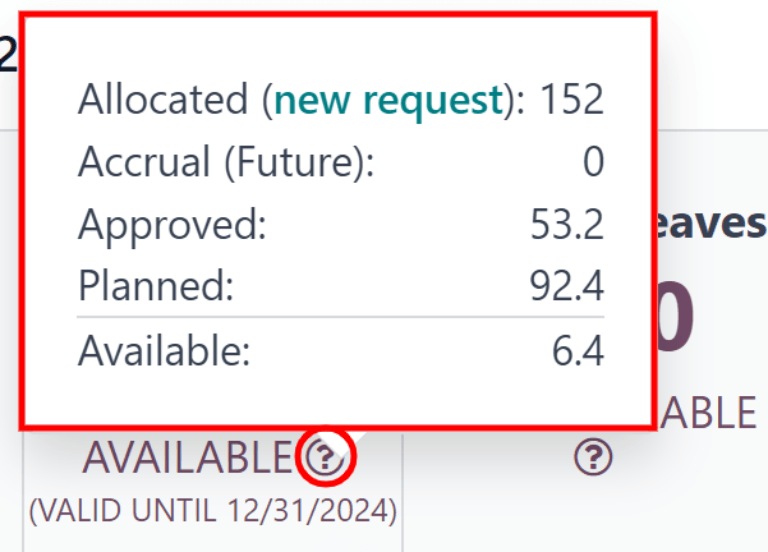
To view the full details of a time off balance, click the (question mark) icon at the end of the (DAYS/HOURS) AVAILABLE on the time off summary. The complete details are presented in a popover window, including the Allocated time, Accrual (Future) time, Approved time off scheduled, Planned time off, and the currently Available time off.
A user can also select a future date to see an estimate of how much time they should accrue by that point. On the right side of the time off summary blocks, there is a Balance at the (date) field. Click on the date, and a calendar selector popover appears.
Note
The Balance at the (date) field only appears if the user is accruing time off through an accrual plan.
The current date is the default date selected. Navigate to the desired date, and Odoo displays the time off balances the user should have on that date. This takes into account all time off currently planned and approved. To return to the current date, click the Today button to the right of the date field.
On the right side of the calendar, the various time off types are displayed, each with their own corresponding color. The Legend explains how the various statuses for time off requests are presented.
Time off that has been validated appears in a solid color. Time off requests that still are still in the To Approve stage, appear with white stripes in the color. Refused time off requests have a line through the dates.
The color for each request corresponds to the specified color set with the various time off types, listed in the section above the Legend.
New time off requests can be made from the Dashboard. Click the New button in the upper-left corner, and a New Time Off pop-up window appears.
New allocation requests can also be made from the Dashboard. Click the New Allocation Request button to request more time off, and a New Allocation pop-up window appears.
My time off
To view a list of all the time off requests, navigate to . Here, all time off requests, both past and present, appear in a list view.
The list includes the following information for each request: the Time Off Type, Description, Start Date, End Date, Duration, and Status.
A new time off request can be made from this view. Click the New button to Request time off.
My allocations
To view a list of all allocations, navigate to . All allocations and requested allocations appear in a list view.
The information presented on the My Allocations page includes: Time Off Type, Description, Amount, Allocation Type, and Status.
A new allocation request can be made from this view, as well. Click the New button to request an allocation.