Offer job positions
Once an applicant has successfully passed the various interview stages, the recruitment team is ready to send an offer for employment. The next step is to send the applicant a contract.
See also
Refer to the recruitment documentation for details on the various stages of the recruitment process.
Contract proposal
When an offer is ready to be sent, first open the applicant’s card by navigating to the , and clicking on the desired job position card.
From the resulting Job Positions Kanban view, the corresponding applicant card can be dragged-and-dropped to the Contract Proposal stage. Or, click into the desired applicant’s card, and click the Contract Proposal stage, located in the status bar in the top-right of the applicant’s form.
The next step is to send an offer to the applicant. Start by selecting the desired applicant’s card to open their applicant form.
On the applicant’s form, click the Generate Offer button. A Generate a Simulation Link pop-up window appears.
Most fields are pre-populated with information from the job position. If any necessary fields are blank, or if any information needs to be updated, enter, or update, the relevant information in the corresponding fields.
Note
Depending on the localization setting for the company, and which applications are installed, some fields may not appear in the Generate a Simulation Link pop-up window.
For example, if the Fleet application is not installed, any fields related to vehicles do not appear.
Universal fields
The following fields appear in the Generate a Simulation Link pop-up window, regardless of the localization.
Contract Template: the template currently being used to populate the Generate a Simulation Link pop-up window. Use the drop-down menu to select a different Contract Template, if desired.
Note
To modify the template, hover over the current template name, and click the Internal link icon that appears to the right of the field. Make any desired changes, then click Save & Close.
Job Position: the name of the Job Position being offered to the applicant. The selections available in the drop-down menu correspond to the job position configured on the main Recruitment dashboard.
Job Title: the selected Job Position populates this field, by default. The title can be modified to suit the specific applicant’s position and provide more details.
Example
An applicant is offered a marketing manager job at a shoe company, specifically for the children’s line.
The Job Position selected from the drop-down menu is
Marketing Manager, and the Job Title is modified for their specific responsibilities,Marketing Manager: Children's Shoes.Department: the department the job position falls under.
Contract Start Date: the date the contract takes effect. The default date is the current date. To modify the date, click on the displayed date to reveal a calendar popover window. Navigate to the desired month, then click the day to select the date.
Yearly Cost: the annual salary being offered.
Link Expiration Date: the number of days the job offer is valid. The default expiration date is
30days. Modify the expiration date, if desired.
Send offer
Once the Generate a Simulation Link pop-up window is complete, click Send By Email to reveal an email pop-up window.
Important
If the applicant does not have an email address listed on their applicant card, a warning appears in a red box at the bottom of the Generate a Simulation Link pop-up window, stating: The applicant does not have a valid email set. The Offer Link won’t be able to be completed. Click Discard, then enter an email on the applicant’s card. Once an email is entered, click the Generate Offer button, and the email pop-up window loads again.
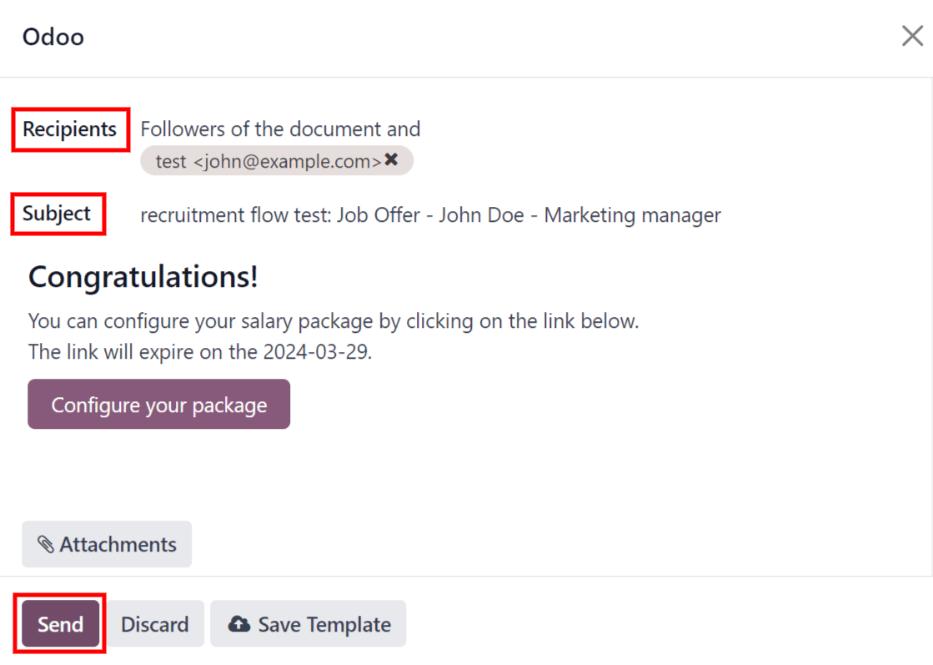
The default Recruitment: Your Salary Package email template is used (set in the Load template field), and the Recipients, Subject, and email body are pre-populated based on the email template.
If any attachments need to be added, click the Attachments button, and a file explorer window appears. Navigate to the desired file, then click Open to attach it to the email. The attachment loads, and is listed above the Attachments button.
Once the email is ready to send, click Send. The email pop-up window closes, and an Offers smart button appears at the top of the applicant’s card.
Note
To send an offer, ensure the Sign application is installed. This is necessary, so the offer can be sent to the applicant by the recruiter, and they can actually sign the offer. The applicant does not need any software installed to sign the offer.
Configure your package
If applicable, the applicant can modify their salary package. This option is not available for all localizations. Depending on where the company is located, this option may not be available.
The email template includes a Configure your package button. This link takes the applicant to a webpage, where they can modify the proposed salary package, and enter their personal information.
Once the applicant is hired, the personal information entered on the webpage is imported to their employee record, when created.
Once all the information is completed, the applicant can then accept the offer by clicking the Review Contract & Sign button to accept the contract, and sign it using the Sign application.
Contract signed
Once the applicant has accepted the offer and signed the contract, the next step is to move the applicant to the Contract Signed stage. This stage is folded in the Kanban view, by default.
To move the applicant to that stage, drag-and-drop the applicant’s card to the Contract Signed stage. If the stage is not visible, click the (ellipsis) button to the right of Contract Proposal on the applicant’s form, and click Contract Signed from the resulting drop-down menu.
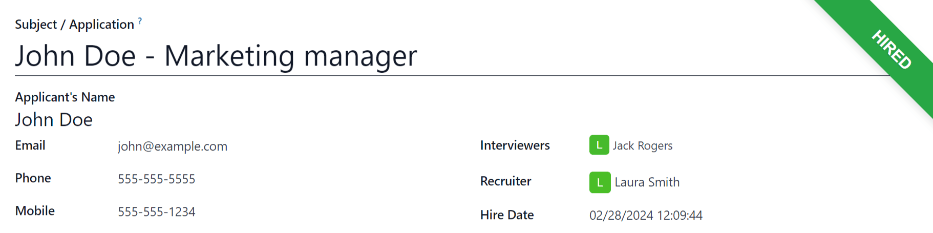
Once the applicant is moved to the Contract Signed stage, a green HIRED banner appears in the top-right of the applicant’s card and form.
Create employee
Once the applicant has been hired, the next step is to create their employee record. Click the Create Employee button in the top-left corner of the hired applicant’s form.
An employee form appears, with information from the applicant’s card, and the employee contract.
Fill out the rest of the employee form. For detailed information on the fields, refer to the New employees documentation.
Once completed, the employee record is saved in the Employees app.